Tuesday, August 30, 2011

ARTV2445 3D Modeling And Rendering II: The Revenge

So our first project was to use the new 3DS Max to unwrap and texture a little house the professor gave us.

Nothin' fancy

We then got to use the cool new feature of 3DS Max 2012 that lets you easily choose where the unwrap seams will be.  After some struggles, I finally got it unwrapped, welded the pieces that shouldn't have been separated, and used the Render UVW template to create a wireframe that I could take into Photoshop.  I took several hours to find and insert the textures I wanted and bring it back into 3DS Max.  So far, so good.

When it was time to render, I put a dome with a picture of the sky over the scene and added an omnidirectional photometric light to illuminate the sky dome and the ground.  I eventually ended up excluding the house from it's light and shadow.  I couldn't figure out the mr Sky Portal.  I then put in a standard direct light to simulate the sun coming from in front of and slightly to the side of the house.  I tried to render in Mental Ray gi. (whatever "gi" means) and that's when the trouble started.  Here's the screenshot of the house before I rendered it.  Pretty nice, if I do say so myself.


Here's that same view rendered:
What the...?


The roof, windows, and doors look all washed out.  And there are all these lines where the polygons are.  Those shouldn't be there.  They don't show up on the ground,  Also, the ground is growing over the bottommost front step.  Wasn't doing that in the screenshot.  I tried rendering in MentalRay without that "gi" thing selected.  No change.  I can't figure out how to keep the textures from being washed out and get those stupid lines off my render.  I pulled an all-nighter and this is what I got?

Not fair, man.  Not fair.

Thursday, August 11, 2011

Final Project

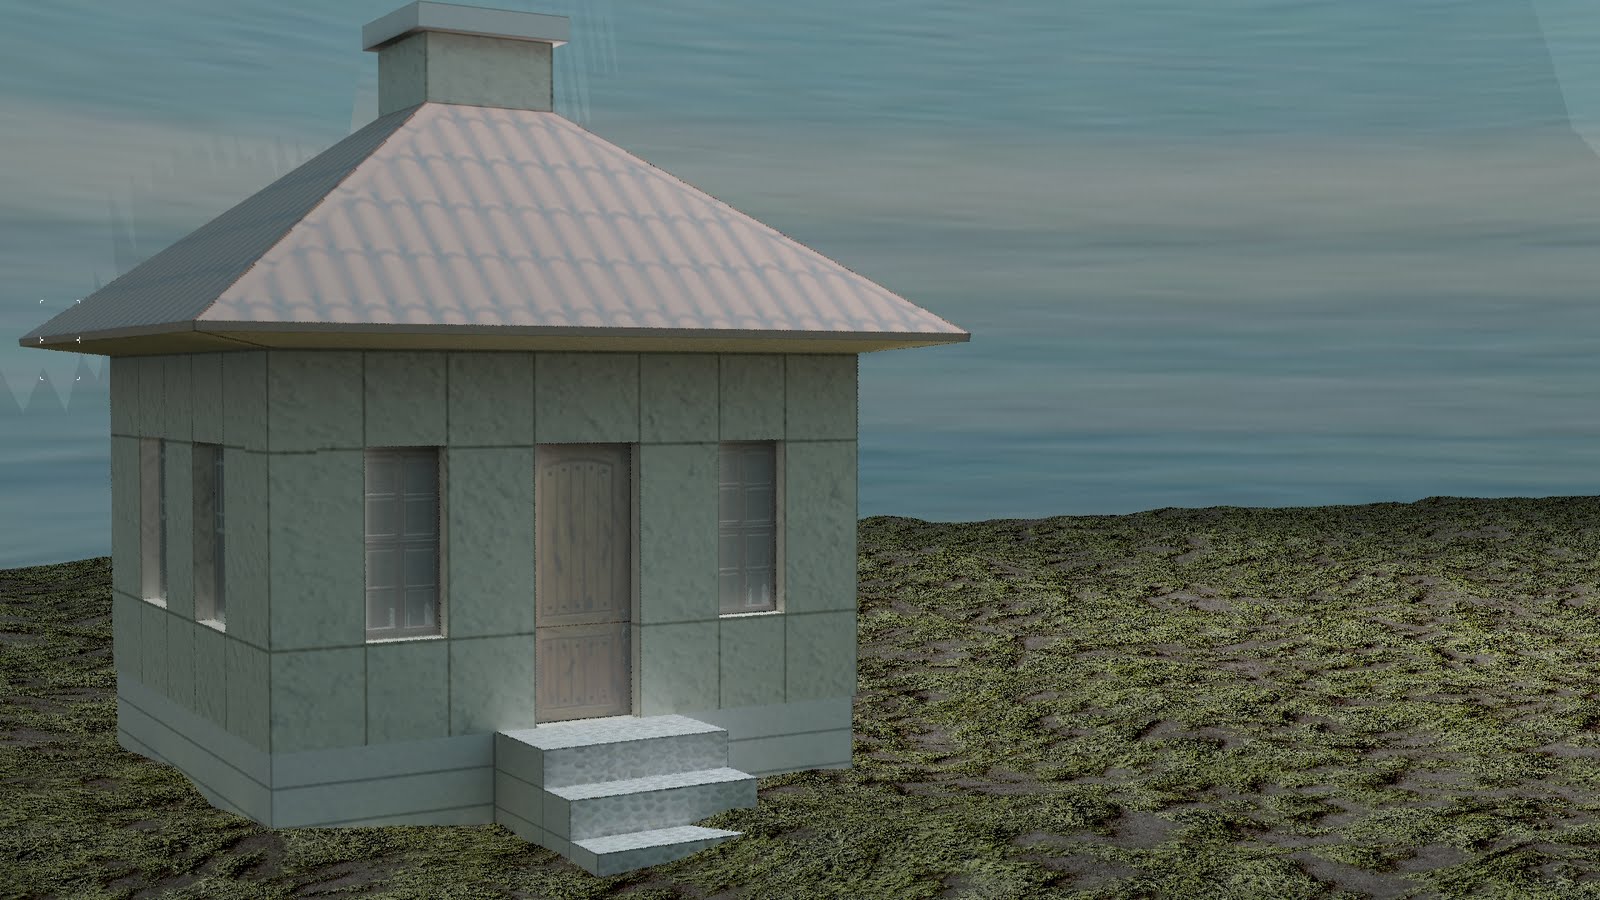
Final project for 3D Lighting and Rendering.

I can't seem to make this work.

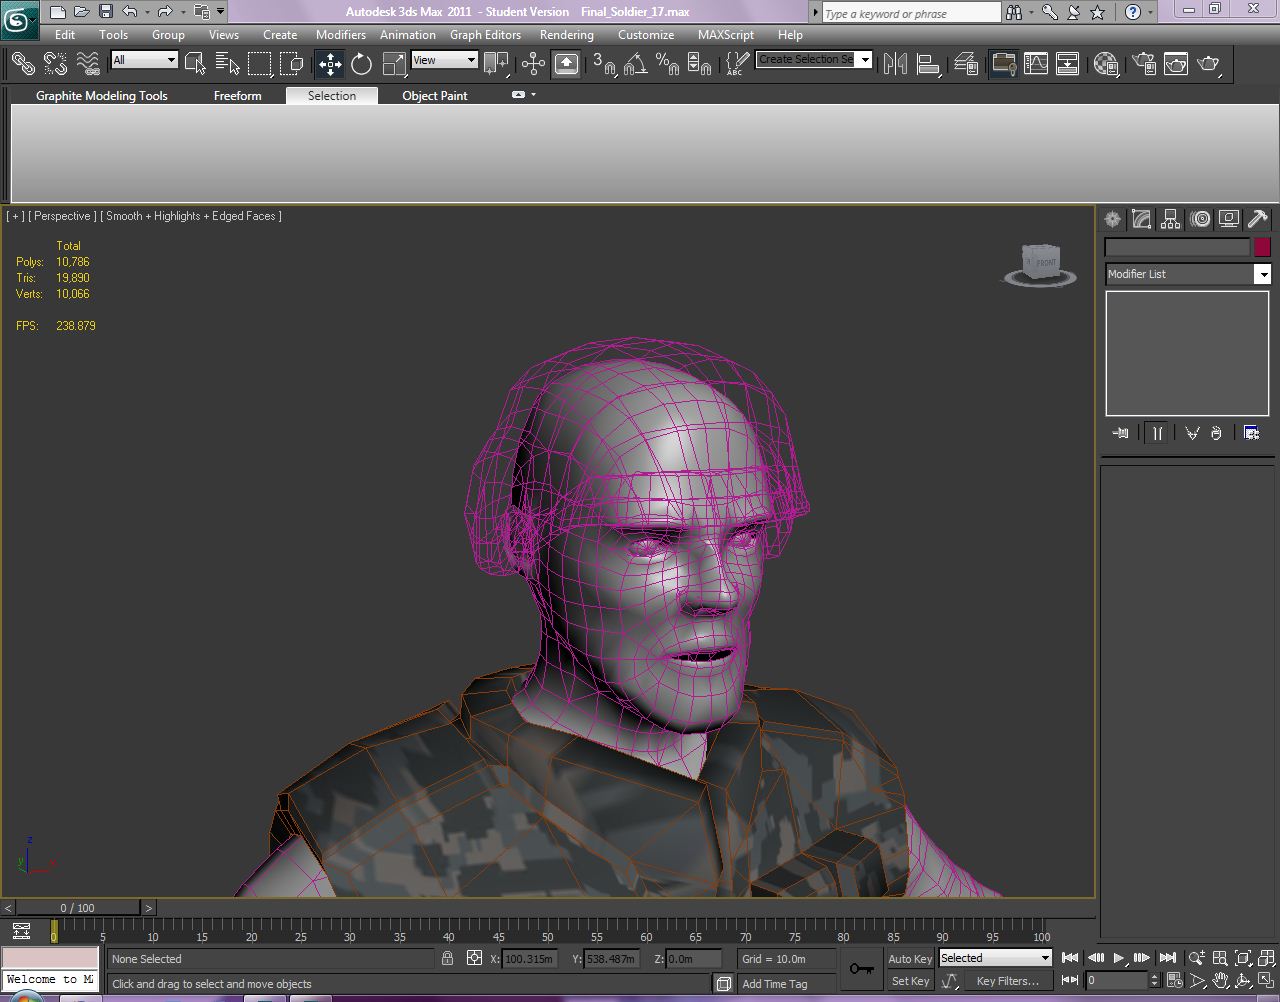
First of all, I had mysterious errors pop up here and there while trying to build my character.  We had a choice of a superhero guy, a swamp monster, or a "civilian" bystander.  I chose the bystander and chose to make him a soldier.  The sort of poor red-shirt who eats it early in the story to show the audience that the situation is serious.  I took the basic man in a shirt and jeans model and built a helmet and combat vest for him.  We were to take our character into Autodesk Mudbox or into Zbrush to give him a more finished look.  First, we had to get rid of the various "n-gons" (polygons of more than 4 sides) throughout the model.


So far so good.
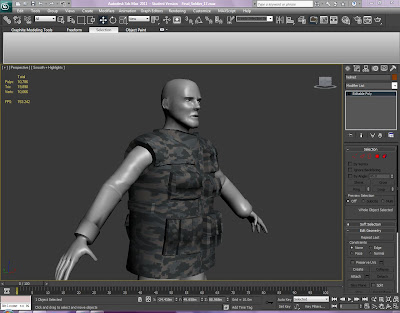
The helmet and vest were created by highlighting some of the polygons around the top of the soldier's head and torso, respectively.  I gave him a stronger chin in Zbrush.  Zbrush also smoothed out the helmet and vest pretty well, too.  I decided to use an older, angular, copy of the combat vest with smoothing groups added to some areas and not to others.  The helmet presented a new problem, and one I've yet to figure out.  I don't know what caused it or how to fix it.  You see the helmet became... invisible.  With the grid lines around the polygons turned on you can see the outline of the helmet.  It's there.  When you turn off those lines, you can't see it at all, no matter what material you put on it.
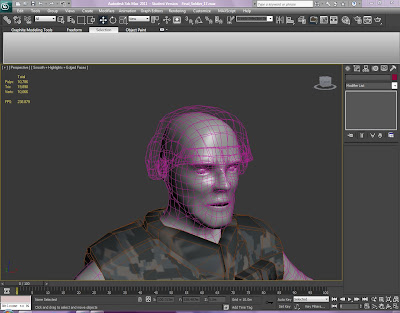
Now you see it...


...now you don't.

Weird.  I ended up using a copy of the original angular helmet with big polygons on it, and adding smoothing.  I downloaded a digital camo pattern from EmiLTu on Deviantart.com.  Next it was time to unwrap the UVWs.  I just unwrapped the helmet and the soldier himself.  I figured I could use old-fashioned UVW mapping on the combat vest.  I took the helmet and soldier wireframes into Photoshop to give them the looks I wanted.  I really didn't need to do that for the helmet.  In future I may add name-tapes and other GI type doodads onto this poor crunchy's kit.

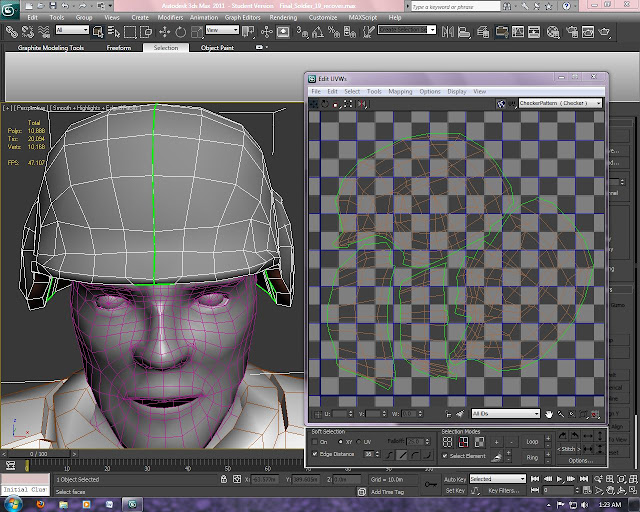
UVs flattened and stitched into 4 large pieces


I put the Photoshopped Targa image onto my soldier-boy and things started to come apart.  Try as I might, I couldn't figure out how to get the camo pattern on his uniform to match the small digital pattern on his helmet and vest.  Eventually, as the sun was coming up, I had to concede defeat and leave it there.

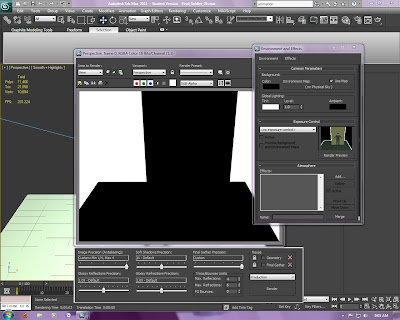
Finally, I had to have some sort of scene for this guy.  Since I didn't have time for a nice swamp scene to Photoshop behind him while matching the lighting, I decided that this soldier would be an action figure from the movie about the heroes fighting the swamp creatures.  I built a simple plane to use as the cardboard backing of his package.  I box modeled a simple rectangular plastic enclosure, turned it's specularity and glossiness way up, and turned it's opacity way down.  That way any lights I added to the scene would reflect off the clear "plastic" of the packaging.


This was the shape of the clear plastic during construction.  Note the little icons floating over the bottom left corner.  That's called a "caddy" and it gets in the way.  Took me the better part of an hour to figure out what I'd done to turn it on and how to turn the bloody thing off.


You can see my sad failure on the uniform and the hint of the plastic around him.  Now all I had to do was light it, bring it into Photoshop, and write something nifty on the "cardboard" backing board.  I set up two photometric lights, one omnidirectional and one a directional light.  I also added a light colored plane underneath the scene for the light to reflect off of.  Then I went to render my scene using Mental Ray.

Nada. Zip. Zilch. Squat.  Bupkus.
It wouldn't render!  Well, the lighting wouldn't anyway.  I even got a preview of the render a tiny window to the right but everything in the scene is black.  I tried switching to a regular (non photometric) light, but no dice.  I can't figure out what I've done wrong.


See, there's the light.  It's that little golf-ball at the upper left side of the image.  The thin line pointing at the action figure shows where it's pointed.  In the window you can see the figure lit up just fine.  No luck with the render.

So it's the next day.  The professor has to turn his grades in today.  I have to leave for work in less than four hours and I've gotten no sleep.  My brain feels like warm tapioca right about now, so this is what I'm going to have to turn in.  Bitterly unsatisfying, but it's what I've got.  I'm going to try and get a couple hours of sleep so I can drive safely to work (where I'll be until 11pm tonight).


In about 2 weeks, I start two new classes.  I wonder what they'll be like?

Saturday, July 9, 2011

Midterm!!

I've gotta put this up in a hurry.  First a screenshot before I did my first render.  Look how well-lit the scene is.


...but when I rendered it, I got a dark scene.  The only light that seemed to have much of an effect was the omni light on the floor under the lamp to get some bounce off the floor.


I've got a spotlight in the lamp and an omni inside the bulb to light up the inside of the shade.  It's like they're not even there.  Perhaps I just need to reposition them.  No time, though.

And the boxes from the point of view of the desk.  First, screenshot:


Then rendered;

I'll betcha it's something as simple as the lightbulb itself casting a shadow that blocks out the spotlight.

Check the gorgeous rust on that door.

Got some of the gray from the outside world, too.

Closeup of the desk.  The dynamite bundle reads :TNT (it's dyn-o-mite)".  Thank you AC/DC.

Finally, the back wall.  Screenshot;

Aaand, render;

Not sure how to make that test pattern glow slightly, to emulate a viewscreen.  I'll need more instruction.


Ok.  Off to class!

Saturday, June 25, 2011

Game Asset Pillar: UV Unwrap Part II

Okee-doke!  We're still working on unwrapping UVWs, manipulating them in an image editing software (read: Photoshop), bringing the newly edited piece back into 3DStudio Max, and applying this beautiful new texture to our object.  This week, the professor gave us a simpler object than a human figure with folds and bends in his clothing.  To get us started he gave us the type of object we might see as a game asset.  He called it an Avatar Pillar.  It's dirt-simple, yet kind of awesome-looking at the same time.

Pretty cool, right?


This kind of pillar is the sort of thing players might use during a game to gain power-ups or something like that.  Since they're going to be right up on it, we should make it look extra nice.  We got some more instruction on how to put textures on an object, go into the "Edit UVWs" window to flatten the verts and edges into a wireframe, and then use "Render To Texture" to get our flat piece of artwork.  Using the default materials (rusted metal on the ankh and stone on the base) I got a basic flat texture to export into Photoshop.


The program tries to be helpful by adding in shadows to your new diffuse map.  Looks awful.  No problem, though, that's what we've got Photoshop for.  Since I've got Photoshop (PS) on my Mac and 3DS Max is on my fiancee's Windows box, I have to send the file over to the Mac.  After using the Alpha channel to remove all the colored portions of the image I was ready to begin finding, massaging, and placing my chosen textures on the diffuse map.  The prof said he'd like us to have 4 distinct renders of this Avatar Pillar, representing earth, air, fire, and water.  Cool!  A few hours PS work and I had my four diffuse maps.  The Earth map looked like this:

I can fix that seam on the base later and re-import it, I suppose
I used a regular white and gray marble for my base.  I was then able to use the adjustment tool in PS to change the color to suit each element: green for earth, yellow for air, red for fire, blue for water.  These are the same colors that many neoPagans use for candles in their ceremonies.  (You never know when random trivia will come in handy.)  For the earth, I even made a second map with the marble base texture removed and the stone of the ankh desaturated to black and white so I could use it as a bump map.  So far so good.  Then all I had to do was assign the diffuse map to each slot in my material editor (ankh and base), assign the bump map to a third material editor slot, apply them to the image and then I could...


What the...  That didn't look right at all!  The textures were much too small and left blank gray areas visible on the object!  Maybe if I tried it again I'd figure out what went wrong.


No, that didn't work.


Ah, come on!

YOU GOTTA BE $#!**!# ME!

Ten hours of work and this is what I end up with?!  Really?  This is the tough guy assignment all over again.  I did everything I was supposed to do.  I made sure the "render to texture" was 1024x1024.  I thought that was supposed to ensure that it fit exactly the same way the original "rendered to texture" diffuse map did before I dragged it into Photoshop.  What changed?  I don't know.

It's less than four hours until class, I'm tired, angry, and confused.  I'm sure there's some tiny obscure detail that I'm missing that's causing this mess, just like everything else in 3DS Max.  I've gotta get behind the wheel of a car in about three hours and I can't think clearly.  I think I'll just take a nap and bring everything with me to class so I can see what I did wrong.  Oh, and there's a midterm on this stuff in 3 and a half hours, too.  Yay!

Friday, June 17, 2011

Surfacing the professor's Tough Guy

The professor dove into the meat of the class last week.  He spent the class explaining unwrapping UVWs.  He also explained and demonstrated pelt mapping, just to show us how it works.  It doesn't seem to have any real advantages over mapping in a planar, cylindrical, spherical, etc. way.  This lesson was super-complicated.  I was following him through, about, the first half of the class.  After that I started to fall behind.  Once I started that downward slide it accelerated throughout the rest of the class.  By the time we were ready to leave I was totally lost.

Uh oh.
So, we got a model of a guy in a jacket and jeans.  We also got a JPEG of the guy's outfit and face all flattened out.  So far so good.  As I understand the process, we are to take each part of the model, display it's planar faces in the "Edit UVWs" window.

Something like this.
We then clean up the vertices and edges and make them, somewhat, fit the flattened out pictures of each item.  At this point my brain says, "a wizard walks into the room, waves a wand, and the images are properly wrapped around the model."  I say that because that's as far as my understanding of the subject has gotten.

Take a look at the "Edit UVWs" window on the right half of the screenshot below.  The irregular green box with the hole in the top is the flattened representation of the body of the model's jacket.  The picture of the model on the right shows a patchwork of the flattened out JPEG as it actually mapped onto the jacket.  What a horrid mess!!


It's worth noting here that, before I made this screenshot, I had gotten the jeans in the "Edit UVWs" window to match the JPEG image of the jeans.  Look at the leg of the model.  Another patchwork disaster.  What happened?  I don't know.


I collapsed the modifer stack, hoping that I could just hold onto what I'd done and start working on another piece of the model.  Maybe I'd have more luck with the jacket sleeve.  Collapsing that stack seemed to completely reset the "Edit UVWs" window.  All that work I did on the verts and edges for the jeans and jacket.  Lost!
And the mapping on the model is still a trainwreck.

I then went right into selecting all the faces on the sleeve.  I applied the UVW Modifier to the stack on top of "Unwrap UVW" which, itself, was on top of "Editable Poly".  Under "Parameters" I made the mapping "Cylindrical".  As I adjusted the size of the cylinder, I noticed that the map on the rest of the model was changing.  I hadn't even selected the rest of the model.  Why was it changing.  I don't know.
What the frak?


The "Edit UVWs" window for that step looks like so.


I can't seem to figure this stuff out no matter how hard I fight.  There are so many details he went over in class and I couldn't write fast enough to get them into my notes.  I tried reading the Help file's chapter on the UVWs Modifier.  It told me about the fantastical, magical things this tool can do but didn't give enough of the step-by-step visual instructions a right-brained artist like myself needs to figure out how to make it do these things.  To top it off, when it seems like I'm starting off correctly, the program throws away half an hour of work without even explaining why.

I don't know what to do, and class is only nine hours away.

New Class, New Challenges

This summer semester I'm taking 3D Lighting and Surfacing 1.  We learned to make basic models in the previous class (3D Modeling 1).  We now need to learn how to cover them in textures that make them look real and light them realistically as well.  I did some of this in the previous class.  This semester's class specializes in that.

Remember that Ammo Room from last class?  We used it again for this one.  This first class assignment I just used the basic shapes as a way to show how my lights would bounce around objects in a scene.  For this I used the basic gray objects instead of the textured objects from last class.  We were asked to use lighting to create 4 different atmospheres or moods.


This first one was just a basic yellowish light with shadows turned on.  I left the windows dark outside.  You can see how the stark single light casts shadows from objects in the room.  That's not all I had to do, though.  You see, these objects don't bounce light off themselves the way things in the real world do.  The overhead lamp was a directional spotlight placed in the same location as the bulb.  I then put an omni at the floor level, the same color as the overhead light to simulate that light bouncing off a white concrete floor.   There's another weak omni light hovering at ceiling level to fill the room a bit more.


The next one was almost the same except I changed the color of the light to red.  I think this turns the Ammo Room into a sort of darkroom.  Whoever works in here is either developing photographic film, or he's going out immediately into the night and he doesn't want to compromise his night vision.  The light bouncing off the floor is red but the shadows are slightly bluish.


This next one is an afternoon scene.  I accidentally made the lamp shade slightly transparent, but that's fine.  I added a yellow-orange directional light outside the window to simulate a sunset.  I also placed a plane outside the window with a desert sky simulating that sunset.  For some reason the map didn't render.  you see the reflection of the sunset on the boxes in the room but not the light out the window.  Frustrating.  I also added a faint omni light just in front of that box.  It's the same color as the sunset light and you can see it reflecting off the barrel next to the box.


Fourth one was meant to be an underwater scene.  To enhance that feeling I made the lamp shine a kind of washed out teal color.  The directional light from outside was changed from sunset orange to underwater blue.  Again, there was supposed to be a plane with the underwater seascape but it didn't render.

This was a decent exercise for helping us think about how light bounces around in the world and what reflected light does from object to object.

Saturday, May 21, 2011

Anakin's gauntlet

Our final project in 3D Modeling and Rendering was to model a human hand.  The hand is one of the most difficult things to draw with pen and paper.  Modeling it in a 3D program is just as difficult.  It's actually much more time consuming.  The teacher gave us leeway to make any kind of hand we wanted.  It could be a detailed human hand, a scary monster hand, a robot hand, whatever.  We just had to use the techniques laid out in the online lesson to make it "come to life".  I decided to make a detailed glove.  Specifically the glove that Anakin Skywalker used to cover his prosthetic hand.

\ 
I tried to include seams on the glove and make sure the straps around the forearm were sharp.  I then tried putting it in an appropriate setting with appropriate lighting.  I couldn't get the lighting quite right, though.  Fortunately, my next class is 3D Lighting and Surfacing.


I have a light source coming from the city in front of the room where the sun is setting over Coruscant.  I tried turning on shadows but I got no shadows from the table or the columns.  None.


I tried to create a chrome texture for the lightsaber.  It seems to be reflecting the wood of the table but I'm not sure it's coming across well.  The table reflection is making part of the saber near the black grips look invisible.  Again, no shadows from the lightsaber or the glove.  I don't know why.


Now here's something kind of odd.  Why is the inside of the glove transparent?  I see the wood grain of the table through it.  Again, not that the chrome cap at the end of the lightsaber is so reflective as to appear transparent.  Again, no shadows.  Not sure why but it was the last assignment of the class.  I'll have to get some more help elsewhere to figure this baffling lighting problem out.  I will, eventually figure it out, though.

Ciao!