 |
| Nothin' fancy |
We then got to use the cool new feature of 3DS Max 2012 that lets you easily choose where the unwrap seams will be. After some struggles, I finally got it unwrapped, welded the pieces that shouldn't have been separated, and used the Render UVW template to create a wireframe that I could take into Photoshop. I took several hours to find and insert the textures I wanted and bring it back into 3DS Max. So far, so good.
When it was time to render, I put a dome with a picture of the sky over the scene and added an omnidirectional photometric light to illuminate the sky dome and the ground. I eventually ended up excluding the house from it's light and shadow. I couldn't figure out the mr Sky Portal. I then put in a standard direct light to simulate the sun coming from in front of and slightly to the side of the house. I tried to render in Mental Ray gi. (whatever "gi" means) and that's when the trouble started. Here's the screenshot of the house before I rendered it. Pretty nice, if I do say so myself.

Here's that same view rendered:
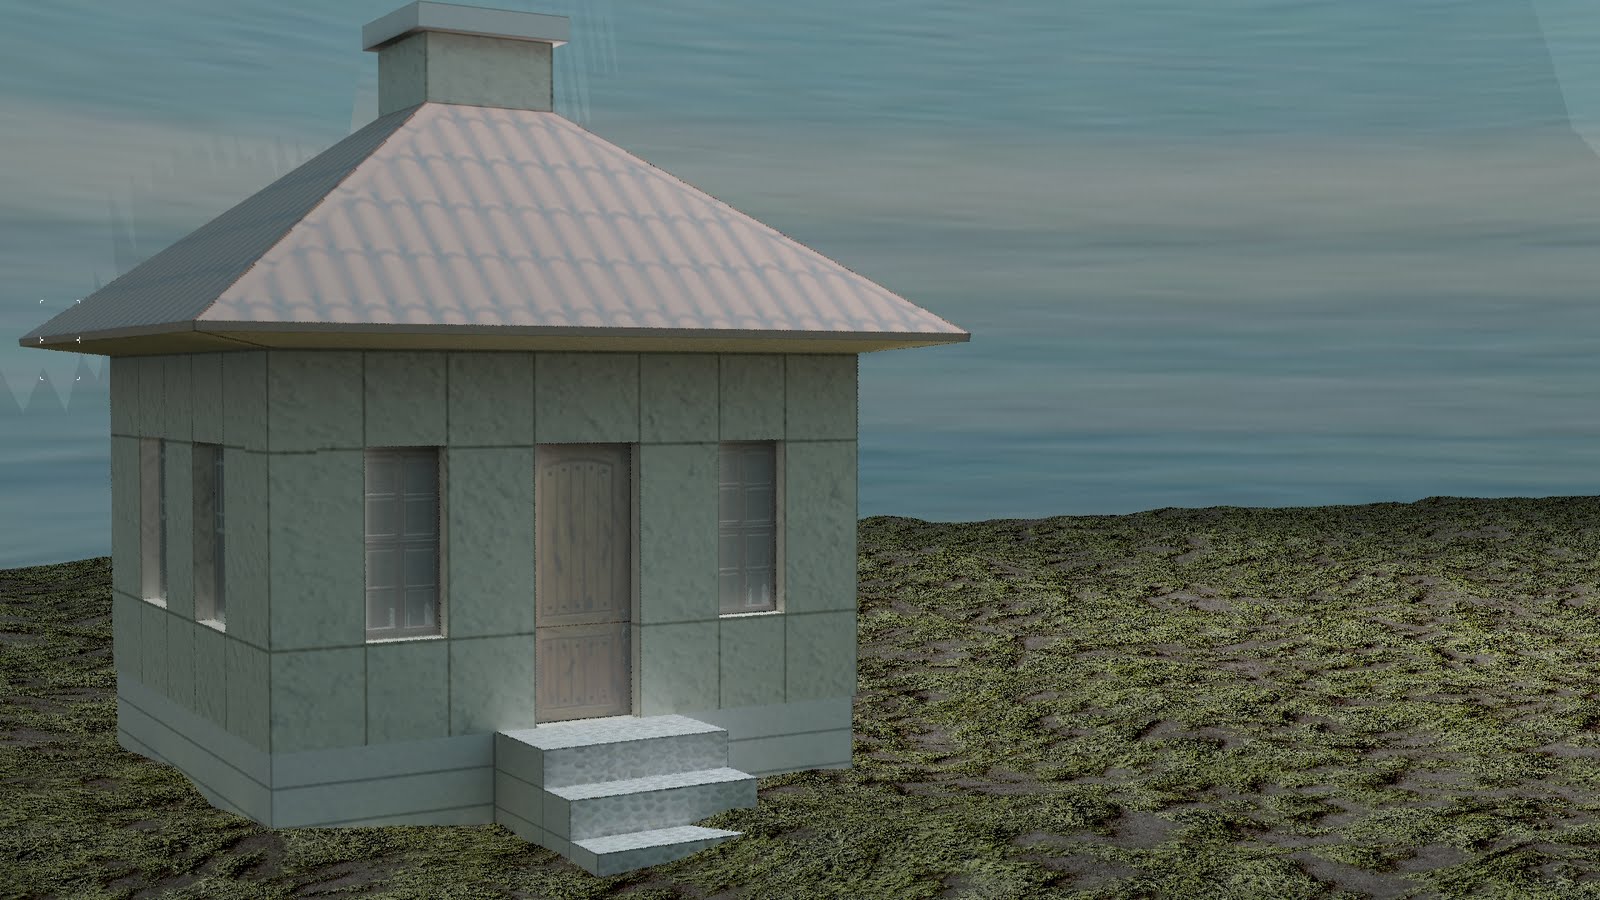 | ||
| What the...? |
The roof, windows, and doors look all washed out. And there are all these lines where the polygons are. Those shouldn't be there. They don't show up on the ground, Also, the ground is growing over the bottommost front step. Wasn't doing that in the screenshot. I tried rendering in MentalRay without that "gi" thing selected. No change. I can't figure out how to keep the textures from being washed out and get those stupid lines off my render. I pulled an all-nighter and this is what I got?
Not fair, man. Not fair.
No comments:
Post a Comment