Tuesday, March 8, 2011

Lathing Splines

Hello, friends and classmates!

Welcome to the latest installment of 3D Modeling I assignments.  This week's episode of the steep, steep learning curve involves editable splines and lathing.  Lathing is exactly what it sounds like.  You make a line drawing, or "spline" of the profile of your object.  When you go to the Modify menu and choose "Lathe", 3DS Max spins that profile into a 360 lathed object.  Being the nerd I am, I decided to lathe out a lightsaber floating above a pedestal base.

First, I made the saber itself.  I'm sure there's a more efficient way to do it, but I used simple corner vertices.  I then converted selected vertices and converted them to "Bezier Corner" vertices so I could create the curves I wanted.  Once I had my saber I used a technique taught by Professor Ben (or is it Professor Beans, not sure) to add an array of non-lathed objects around the circumference of the lathed object.

I created the object I wanted, in this case, grips for the lightsaber.
  • Select "Hierarchy" from the Command Panel
  • Go to the top view of your lathed object
  • Set Pivot Point as close to the center of your lathed object as you can manage
  • Choose the Rotate tool from the main menu
  • Hold shift and rotate to the point where you want the second copy of your object and release
  • In the window that pops up, choose how many more copies of your object you'd like and hit "OK"
This should allow you to add jewels, architectural elements, whatever.  For my part, I created this;


I used a rough metal texture downloaded from http://www.morguefile.com by using "steel" as my search term.  The grips are a wood fence texture from 3DS Max's own Materials Library and created using the aforementioned process.  I made the activation button a separate piece.  I converted it to an editable poly, selected the center square, and used the "Extrude" modifier to push the center rectangle down.  I then made the button black but made the recessed central part red.  I then self-illuminated it in the Materials Editor.  At some point I'll probably use different splines, put together in a group to build my object  This should make it easier to assign different colors and textures to the object.  This saber is all one color, but that's fine.  I'm just a n00b.

I created a lathed object for the anti-gravity, lighted base thingee.  This time I turned down the segments to 8 so I could get an octagonal base unit.  I used the "Spline" tool to create 4 small gray elements on it.  I then created an octagonal plane to set into the center of the object.  This, I self lighted in anticipation of the lighting effect I planned to use later.

The bright white of the central octagon is due to the fact that it's self lighted.

Then I created a simple stone pedestal for everything to rest upon.  For the marble pattern of the pedestal, I actually used a sample of galvanized metal from www.morguefile.com.  It was already kinda greenish, and that worked just fine for me for a bitmap to use as a Material.  A little fiddling with the UVW settings gave me this;


I'm not sure what's up with that weird star pattern on top.  I think I may have shrink-wrapped the texture on.  It's not a big deal, since that flaw will be covered up with the base.  I created a simple plane for the floor and used the same galvanized metal texture, with a bit of Bump Mapping to create decent floor tiles.
I used a spotlight and two omnidirectional lights to illuminate the scene.  I also addded a second spotlight placed into the top portion of the column object.  The cone of light was adjusted so that it looks like the light is coming out of the black, octagonal base piece.  I added an atmospheric effect to make sure you can see the cone of light.  I *did* turn off shadows on the light from the base.  I think they would only have been distracting.


Part 2 of this assignment promises to be a doozy.  Lofting.  I'll letcha know how it goes.  Meantime, the sun's about to come up, I've been drinking rum and doing 3D artwork, and I'm tired.  A cozy bed with a cozy lady awaits me at the other end of the house.
Ciao!

Saturday, March 5, 2011

3D Modeling: Lighting

*Whew!*

This one was a challenge.  The good part is, it was easier than any of the others.  I don't know whether that's because I'm finally getting it, or because there was so much less to do.  I took the "ammo room" I textured in the previous assignment and applied lighting to it, instead of the generic "everything is magically lit" way it showed up initially.

First we had to light the room as a whole.  I decided I wanted the feel of a quiet room late in the day.  I took the overhead lamp hanging from the ceiling and made that my "spotlight".  I added a, slightly yellow-orange, omnidirectional light outside the window.

Screenshot before rendering


It took a huuuge amount of fiddling, clicking, and head-scratching to do this.  Added to this is the fact that I couldn't seem to get started.  It wasn't until late afternoon/early evening that I really managed to get settled down to work.  I only got the overhead light done before I had to leave, though.  It was my fiancee's birthday and we were meeting about 16 friends and family for dinner out.  Great study break.  After a nice dinner and dessert out I came back home and put my poor inebriated sweetie to bed.  She shooed me out of the room to finish my homework so it was back to the keyboard for me.

The outside picture doesn't look like sunset and I didn't have time to adjust it.  Pretend the sky is orange, okay?


After I did the first two lights I decided to put the third light outside the slightly opened door.  I spent what seemed like forever tweaking the settings and moving the dadgummed thing around.  I couldn't seem to get the background picture I had placed outside the door to work properly.  At some point I recalled that I'd inadvertently erased it from the Materials Editor at the end of the last class.  I went out to http://www.morguefile.com to grab another desert scene.  I quickly assigned it to the plane outside the door in a fraction of the time it took me last week.  Hmmm... maybe I am learning something.  I went to the closeup cam at the table and turned it towards the doorway.


I set the bitmap for the desert scene to self-illuminate.  This turned out to be a terrible mistake.  I suddenly couldn't see the desert outside the door when I rendered!

What the heck?!!
Just a white glow.  It didn't look that way in the viewport.  I then spent AN HOUR fiddling around with settings in the renderer trying to get my bitmap of the desert to show up the way I wanted.  Nothing I tried worked.


  I started to despair that there must be something wrong with me and maybe I'd never learn 3D Studio Max.  It's always one thing after another.  After clicking options, rendering, seeing that it didn't work, resetting and picking another option to change, I turned off the self-illumination of the desert map outside the door.  The desert picture suddenly rendered, but very dim.  I'd set some kind of background lighting setting to a salmon pinkish orangey color and that tinted everything more like a sunset.  It was kinda dimly lit but, by this point, I was done.  I punched up the specularity on the bitmap in the Materials Editor and did my final render.


You can make out a fuzzy ball of light peeking around the doorway between the door and the desert scene.  That's my omnidirectional light reflecting off the plane that the desert scene is mapped onto.  I might go back and fix that but not tonight.

Part two of this assignment was way easier.  Pick an object and give it three-point lighting.  Use a main light, or "key" light.  Add a "fill" light to bounce light around the scene.  Finally, include a "rim" light to flesh things out.  I'm still not 100% satisfied with the results.  I know that as I get better at this (if I get better) I'll be able to light things more realistically.

First I used a directional spotlight next to the camera for my key light.


I used an omnidirectional light off to the right for my fill light.  Shadows were turned off and it was given an brownish gray glow to blend with the wood of the table and the stone of the walls.


I decided to place my rim light outside the window since it was an obvious light source.  It seemed silly to pretend that it wouldn't add light to the scene.  I did use a light so pale yellow it was, pretty much, white.


The asssignment instructions said to turn off shadows for this rim light.  A rim light is normally supposed to add depth to your object without looking like there's an obvious light somewhere in the scene.  I looked at this image and decided that the bars, without shadows, just looked fake.  I tweaked some more setttings until I got some shadows to fall across the table.


I didn't get them to fall across the edge of the window like I wanted.  Perhaps adding a more directional light, shining from higher up, would accomplish that.  Anyhow, this image ends up looking a little like someone has the dynamite in the beam from a flashlight or a light mounted on the front of a helmet he or she is wearing.  The notable thing was that part two of the assignment took, maybe, a quarter of the time part one took.

After class last week one of the department tutors urged me to read the 3D Studio Max quickstart guide cover to cover before continuing on with the class.  He said that he did that and, suddenly, the high-speed lectures in class made sense.  I was trying to use the book as a reference guide and it wasn't much help.  I'm now using it as a textbook.  It's several versions behind, but reading straight through seems to be helping.  I'm only part of the way through (textbooks are pretty dry) but I will eventually finish.  If I can reach that "aha!" moment, I'll be able to create anything with this program.  Right now  3D Studio Max's interface is so user-unfriendly to me that it feels like Torquemada headed the design team.

You know.  Torquemada?

*sigh* Look it up.

Saturday, February 26, 2011

My Ammo Room Assignment is Finished!


It is currently 8:30 in the morning and I have been up since, about 9:30am yesterday morning.  hooray...  I'll probably have time for a 2 1/2 or 3 hour nap before I have to go to class.  After that it's caffeine and sheer stubbornness to keep me alert until I can come home and crash.  It was fortunate for me that class was canceled last week, giving me an extra week to do stuff one of my classmates did in about six hours.  Before I get to showing off, though, I want to express my most sincere thanks to my friend Otter.  (Legal name's "Katie" but no one calls her that.)  She took about six hours out of her Friday to come over and personally help me with my project difficulties.   Things progressed noticeably faster after that.  I never would've finished without her help so, thanks Otter!

Okay.  Anyone reading this may recall the initial look of the Ammo Room as it was assigned to us by Professor Ben.


Mmkay!  Pretty basic shapes all sitting there with the colors 3DS Max assigned them when they were created.  This wild color scheme helps to identify which object is which, especially if they're clumped together to create bigger objects.


This is what some unfortunate soul would see upon knocking at the door of this personal bomb bunker.  Upon stepping into the room the visitor may began to question the life choices which led him/her to this point.

This place is Talibantastic!

"Please close the door behind you.  We wouldn't want anyone... unsavory wandering in."
And this is the view from the stool at the table on the far end of the room.


And about that table...


 I didn't quite have time to fiddle with the wood texture on the legs.  I wanted it to go vertical, the way I managed it on the stool.  Oh, well.  Maybe next time.  I managed to fix the weird way 3DS Max was mapping the stones to the wall with the window.  I had it map to the room as a box.  I'm writing this down, because I expect to forget it completely in a day or two.

You may have noticed the a bit of desert outside the windows.  There's some visible outside the door, too.  I just raised a flat plane, duplicated it, and put one in front of the door, and one in front of the window like a big movie screen.  Then I just put my desert scene on that plane.  I had the devil's own time getting the scene out the window to render though.  The windows just showed pitch black for over half an hour before I stumbled upon a setting in one of the Render window thingees.  "Render Iterative" I think it was, but don't quote me on that.


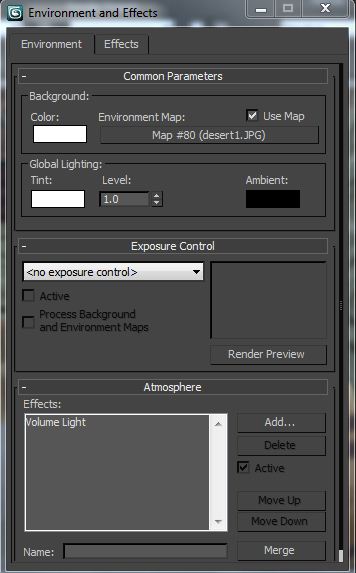
Wasn't until I changed the background color from it's default black to white, that I got the desert image to show up.  Using the Help files to type "render objects outside window" or "render objects outside scene" was absolutely no help.  Neither was the QuickStart Guide.  I just had to stumble on it.

And since I mentioned iterative rendering, Otter advised me to get into the habit of iterative saves.  i.e. don't just save the project your working on under it's own name.  Every once in awhile do a "Save As" and save a version under a slightly different name (like adding 1, 2, 3, etc.)  That way if (when) something screws up in a way that's unrecoverable, you've made a save point that will keep you from having to start over from the beginning.  But back to the project.


Most of my textures were lifted straight out of the 3DS Max materials library.  There's some good stuff in there.   http://www.morguefile.com is also a huge database of copyright-free images available for free download.  It's awesome.


I also spent a couple hours in Photoshop building crates and barrels that I liked.  Basically I got a copyright free picture of a wooden fence, this one from http://www.photos-public-domain.com.  I then got a pic of rusty steel from the MorgueFile and made used the rectangular marquis tool to cut it into strips and put each strip on it's own layer.

Because combining alcohol with high-explosives never goes wrong for anyone.

  I made a top to the barrels, but I couldn't figure out how to isolate the pixels on the top of the barrel 3DS Max object.  I just wrapped the the texture around the editable poly object as a cylinder and the program did the rest.  Easy, for a change.  I made square selections from the fence to create the sides of the boxes.  I selected individual boards to create the boards bordering the boxes and then just slapped some text on them at 50% opacity to make it look cheaply painted on, just like with the barrels.  I played with the levels Photoshop to darken some of the wood and make it look aged.  I really should've gone farther with the aging.


And there's also no way this could ever end badly for all involved, right?
Finally, I made my own wanted poster for the wall over the table.  Wasn't impressed with the one that was included with the assignment.  I took a free aged paper rectangle off the Web, but I could also have also used brushes and textures to create my own aged paper.


Who is that dashing rogue?  Oh, I do hope some hot brunette policewoman manages to apprehend him before he can break any more hearts!

In conclusion, if I can get a little more face-to-face tutoring I should be able to keep up with the pace of instruction in this class.  I heard a rumor that there's actually some kind of 3DS Max tutoring available at school.  I'm going to investigate this next week.  First, though, class and then sleep.

Monday, February 21, 2011

3D Modeling Assignment #3 part 1

So here we are again.  I've got a project in 3D Studio Max to put textures, materials, and maps onto a pre-made scene.  This one is an "ammo room".  It's a simple room with bars on the windows.  There is a camera set to provide a wide shot of the room and one for a closeup of the table in the far right corner.  Thusly.


All I have to do is put textures and images on these surfaces to make them look real.  Should be easy.  Select your object, drag and drop the surface you want it to have, and adjust the size and orientation of that surface.  Again, though, it's proving a greater challenge than I would've imagined.  After a day of work I've only gotten as far as the floor, walls, table, chair, and a couple of sticks of dynamite.


 You'll notice that the brick texture on the walls looks weird and stretched in places along the wall with the window.  I have no idea why this happened, so I have no idea how to fix it.  I tried to use the Multi/Sub-Object mode of the Material editor on the triangular bundle of dynamite on the table.  I tried to select the dynamite sticks, the fuses, and the wrapper and make them each a sub-object.  I then tried selecting each one of those sub objects and dragging the color I wanted onto them.  Didn't work.  It ended up changing the whole assembly to the red of the dynamite or the dark gray of the fuses.  When I tried selecting the wrapper and dragging a bitmap image for the wrapping the bitmap wouldn't even drag and drop from the Material Editor's Sample Slot onto my object.  No dice.  Truthfully, though, I had the wrapper bitmap in a separate Sample Slot from the Sub-Object sample slot from where had both the red and gray colors.  I couldn't quite figure out how to make the bitmap show up as my third selection in the "Multi/Sub-Object Basic Parameters" window.  I'd hoped that just dragging it from a Sample Slot would work.  It won't drag and drop to anything  in the scene at all.  Infuriating.

After almost 8 hours of banging my head against the same wall I gave up and went to another part of the house to do something else.  I figured I'd work on a creative project I actually understood and did some very basic woodworking.  I used an oak plank and some screws from the local hardware store to build a little Zen meditation bench.


I sealed the wood with one coat of a gun stock oil and let it dry overnight.   I then used some scrap fabric and the stuffing from an old pillow to make a bench cushion for it.


I figure I could use some serious centering during this very difficult learning process.  We'll see if it helps.


I have asked for some outside help with this project.  I'll now wait for responses and try again.


Saturday, February 12, 2011

3D Modeling Assignment #2

Ugh!  Finally finished!

This assignment was to use lines to create the outline of a shape. This is called a "spline", as I understand it.  Once the basic shape is made 3DS Max lets you raise that shape up from 2D into 3D almost like magic.  It's like magic if you already know how to do it.  I decided to flesh out the logo my fiancee and I are thinking about for our wedding next winter.  We wanted an intertwined V and A representing each of our last names (she'll be keeping hers).  Here's the basic pencil sketch;


 Not too bad, I think.  Then the "fun" began.  I started this assignment the night before, thinking it would be easier than the first.  Nope!  This was another miserable exercise in frustration.  The first obstacle was the fact that I couldn't quite figure out how to get the image into 3DS Max, to put it onto a "reference plane" so I could trace over it with the 3D tools.  At first I couldn't even get the program to see the drawing at all.  I saved it as a GIF, JPG, and PNG in my attempt to open the image in 3DS Max.  Eventually, I found the passage in my notes that said to open it with the Materials Editor, choose the image as a bitmap and put that bitmap onto the flat plane I created for it.  Simple, right?  Then the real fight began.
After several false starts, and struggles to get the program to do... *anything* I wanted it to, I managed to hack out the letter "A".  I then copied the "A", turned it upside down and backward, and removed the vertices for the crosspiece of the "A" to get the letter "V".  I lengthened the upper right arm of the "V" to get a nice swoop.  I tweaked the two letters and placed them one atop the other.  I then "raised" them up from flat 2D shapes into 3D letters.  I tilted each letter, one to the right and one to the left, to make them look intertwined.  I then picked a font that looked similar to the logo (Harrington) and typed out her name horizontally.  I wanted my name vertically, but this program won't do that.  I had to create seven separate letters and arrange them into a vertical pattern.  Same with the date.


The assignment called for beveling the logo.  The letters were too thin to make that work, so I chose to bevel the top of the logo itself.  What a mess!!!  It took me over an hour to figure out how to even do that.  There's no simple "Bevel" tool in the Modify panel.  None!  I eventually right clicked on one of the logo letters and converted it to an editable mesh.  I then selected the entire thing as an Element.  I changed the selection to Face and got the top face of the letter.  I then changed the selection to Polygon to get the bevel tool.  I moved the tool's slider to get a decent angle.  I repeated the process with the other letter.  That's when I noticed the points on the letters were all messed up as the bevel had the faces crossing and... I dunno, screwing up.  I removed verteices from the train-wrecks on the ends of the letters one-by-one.  This left gaping holes in the shape.  Solving one problem created another!  I went online to try and find a solution.  One solution was to go to "Modify" in the toolbar, then to "Mesh Editing", then to "Cap Holes.  This left me with freaky shaped "caps".  More problems.  Another hour of fighting and I eventually found out how to create faces.  I painstakingly closed each hole in an imperfect but acceptable (by this point) way.  I created each facet of the pointy shape by hand.  I then tried to tweak an unsatisfactory shape to a couple of the lines of the letter.  Vertex by vertex, face by face, I massaged the logo into a more fluid shape.  Another hour or so.  Then came the fight with the material editor.  I wanted a metal look to the logo, like silver or chrome.  I had to settle for an odd painted look.  Online help and the quickstart guide are really of limited utility with 3DS Max.  I finally surrendered sometime after 6am and started writing this blog entry.  The "easier" project took almost 10 hours.  I'm now going to crawl to bed for a few hours of sleep before class.  My sweetie and I have a date after I get back from class, so this is going to be a long-ish day.

At least there will be wine and cake at the end of all of it.  And the cake is not a lie.

Saturday, February 5, 2011

3D Modeling Project 1

Okay, so this week we had our first "small" project assigned in my 3D Modeling class.  We're learning Autodesk 3D S Max.  After the professor gave us an introductory lesson on the program we were to take what we learned home with us and build a 3D model of a robot.  I quickly remembered a little bot I sketched way back in 2002 and thought she'd be a fine subject for this project.  It is with this in mind that I unleash upon an unsuspecting Mankind...

Kathy Killbot


Remembering what we'd learned about orthographic drawings, I hacked out a front and a side view of my planned robot for this project.  I never got around to a top or a 3/4 view.  The semi orthographic picture came out thusly:


I (correctly) figured a droid floating on an anti-grav sphere would be easier to model than one on two, or more, articulated legs.  The finger joints alone were a project unto themselves.  Even without modeling legs on my little murderdroid I had no idea of the difficulty I was in for.

This project started off with what 3D artists call "primitives".  "Primitives" are your basic building blocks for all shapes, no matter how complex they eventually become.  These are your spheres, boxes, pyramids, cylinders, tubes, cones, what have you. By starting with these basic shapes you can morph, stretch, chop, bend, squeeze,  and squash out anything you can imagine.  At least in theory.

I started out with a box for the torso, sphere for the head, tube for the neck, a shorter tube for the "belt", and a cone for the "skirt".  At this point it's worth noting that if you want to learn 3DS Max it is well worth finding a teacher who can sit with you while you work on your first few projects.  I tried using the introductory vids, my memories of the class lecture (I'll take more notes next time), a 500 page visual quickstart book, and a YouTube tutorial that looked promising.  Problem is the program is enormous and incredibly, incredibly, counter-intuitive.  It's very easy to miss a tiny detail that can drag your project to a halt.  Almost everything you do will have such a show-stopping detail or ten, and it's hard to find answers to such small but critical problems.  After, literally, hours of frustration, anger, confusion, and blind luck, I managed to create and modify my basic "primitive" objects into something close to what I wanted.


I got the torso bent and tapered pretty close to how I envisioned it.  I converted my torso to an "editable mesh" and then modified it.  I should've added more segements and vertices first, though.  I'd though I would have little hemispherical indentations where the arms would go and some detail on the chest resembling a jumper or an apron (see concept sketches above).  Once the torso object was turned into an "editable mesh" I never could figure out how to add more vertices.  It took so long to modify the object I had, I wasn't about to scrap it and start over.  I learned my lesson and added vertices to the bottom of the cone so that I could stretch it out into the point you see there and added my anti-gravity ball to the bottom.  I would like to have added more detail to that ball but even the simplest things were hard work.  Maybe next project.

Next I created an arm using a ball for the shoulder, two thin boxes for the upper arm, a disk for the elbow, box for the forearm, ball for the palm, tiny balls where the fingers join the palms, tiny boxes and disks for the finger joints, and wickedly curved and pointy pyramids for the fingertips.  I then duplicated these arms and mirrored them to get a distinct left and right.  I thought I'd be clever and group the arm structures.  Once grouped I couldn't figure out how to open and close the group in a selective way that would be useful to me.  That turned out to be time wasted.  I ended up just selecting whole structures and moving them around the way I wanted.  I used tubes, disks, and a "capsule" shape to make a minigun for the left forearm.  I used a box and pointy pyramid for the extendable blade on the right.  The blade was a case of "close enough is good enough". and I jammed the wonky part far enough into the box shape to hide it.  From a distance, though, I think it looks pretty good.+
I spent a few hours after work (I get home from work around 11:30pm) for several nights on this and 8 hours straight the day before class.  I'm sure one day I'll be able to crank something like this out in an hour.  That day, however, is not today.  I managed, after a spirited battle, to create a sunken area for the eyes and a tiny, anime-like, nose.   I added a bowl hair helmet with a pony tail and a big red bow to finish everything off.

Couldn't figure out how to add color to the eyes or a pair of pouty lips so she can blow a sarcastic kiss to her dying victims.  Maybe someday I'll revisit this project armed with a host of polished skills.  I might start a whole series of Kathy Killbot cartoons.  I already have some titles ready.  Kathy Killbot's Hardware Store Adventure.  Kathy Killbot's New Best Friend.  Kathy Killbot's Holiday Massacre.  Kathy Killbot: Radical Surgery.  Kathy Killbot in Suffer the Children.  Kathy's Shallow Grave Boyfriend.  Pain Threshold: A Kathy Killbot Graphic Novel, and many others.

Why don't I hear you laughing, friend?
 Nothing like a big red bow to make a digital death machine feel pretty and feminine.


If I ever have a daughter, I swear I'm dressing her up like this one halloween.

Overall this was the most miserable experience I've had doing homework since high school.  I am a grown-ass man and I felt like crying and throwing stuff at times during this project.  Thing is, I actually learned from this ordeal.  I learned to take more notes during the lecture.  I learned that I need to seek out my friends who have used this program for more immediate assistance.  I learned that hitting ctrl+X when you meant to hit ctrl+S or Z orC will make your toolbar vanish.  Hitting it again will restore your toolbar. (It took restarting the program a couple of times before I figured out what I'd been doing to lose my toolbar).  Finally, I suspect that, for the computer graphics world, learning 3DS Max is like some kind of crazy boot camp.  It's unnecessarily difficult, you think you'll never cut it, and you question the wisdom of ever starting on this path.  After it's over, though, I'll probably feel like an unstoppable 3D modeling juggernaut ready to chew on red-hot polygons and ask for seconds.

Personally, I think a forced march in full-pack might have been easier.